Here's the procedure for swapping the brake pads on the 5.7L LX's. I believe the process is essentially the same for the V6's also (but haven't confirmed). The Brembos are different, and I'll do a write-up on those soon. UPDATES: I added information on servicing the Guide Pins to this thread, Post #16 below. Also, I never talked about preventing brake squeal (which I had a lot of, after swapping pads). Info on how to prevent squeal is Here.
Tools needed:
13mm, 15mm, and 18mm box- and open-end wrenches.
Two Quick-grip clamps, or c-clamps with two small blocks of wood (1x2x2 or so).
12" of some tie-wire or string.
Aerosol brake cleaner.
Front Brakes - Starting Point:
![Image]()
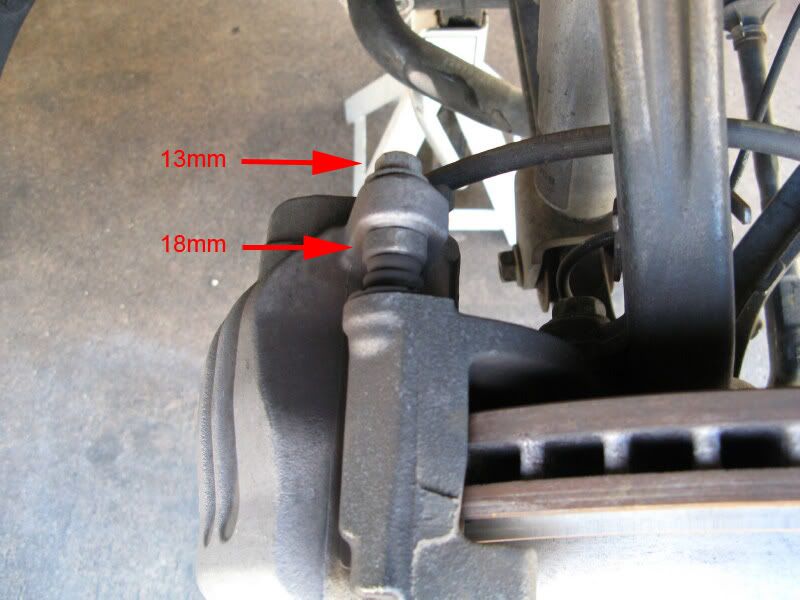
Here's the top of the caliper assembly. You'll be working on the bottom of the assembly, not the top, but it's easier to see what needs to happen when looking at the top. There's a 13mm bolt that comes from the backside of the assembly, and a bushing that it passes through (called the guide pin), which needs to be held with an 18mm wrench:
![Image]()
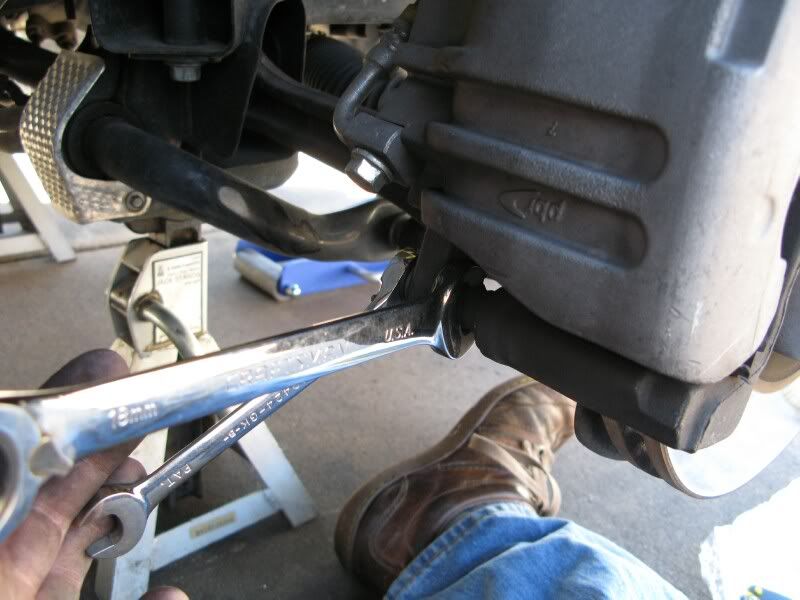
Here's the bottom of the caliper, with the wrenches on the fasteners. You need to remove the 13mm bolt, while keeping the 18mm guide pin from spinning:
![Image]()
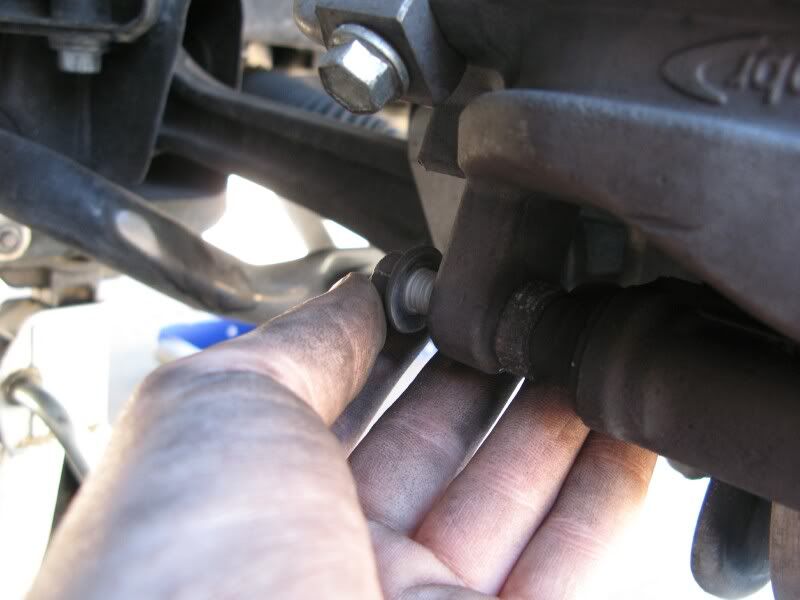
Once it's loose, remove the bolt:
![Image]()
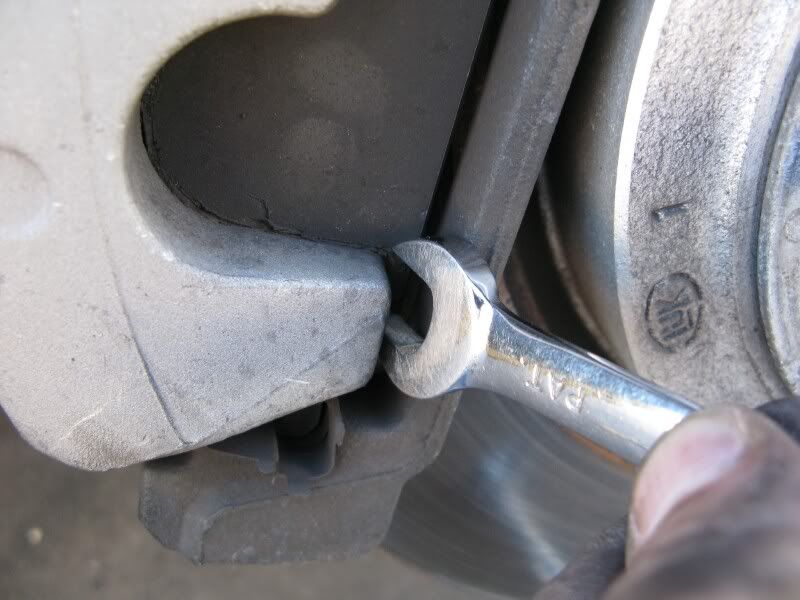
Then take the end of the 13mm wrench and pry the caliper away from the assembly:
![Image]()
Then rotate the caliper up and away from the assembly. If it's really snug, before you rotate the caliper upwards, pull the caliper towards you firmly for a few seconds, and then back away from you - this should retract the pistons enough to provide the clearance necessary.
![Image]()
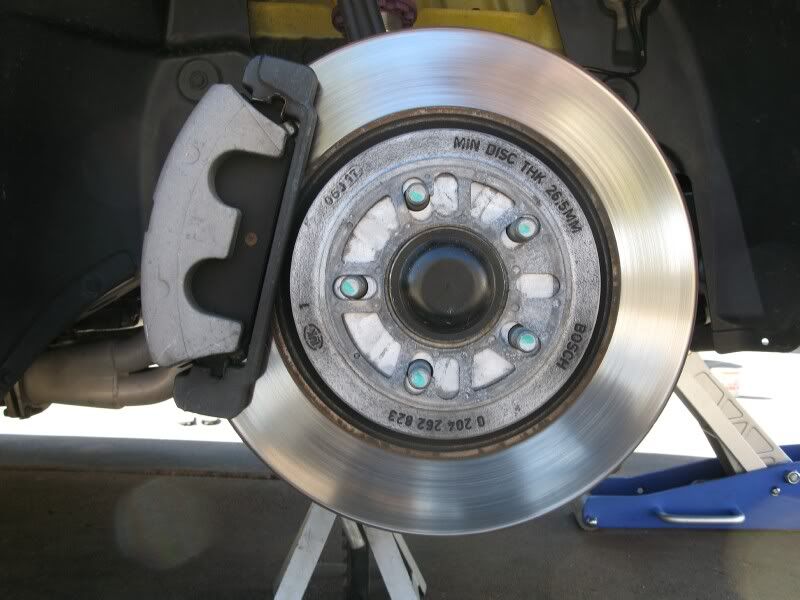
Here's the caliper rotated up. Tie the caliper up and out of the way (I used some copper wire):
![Image]()
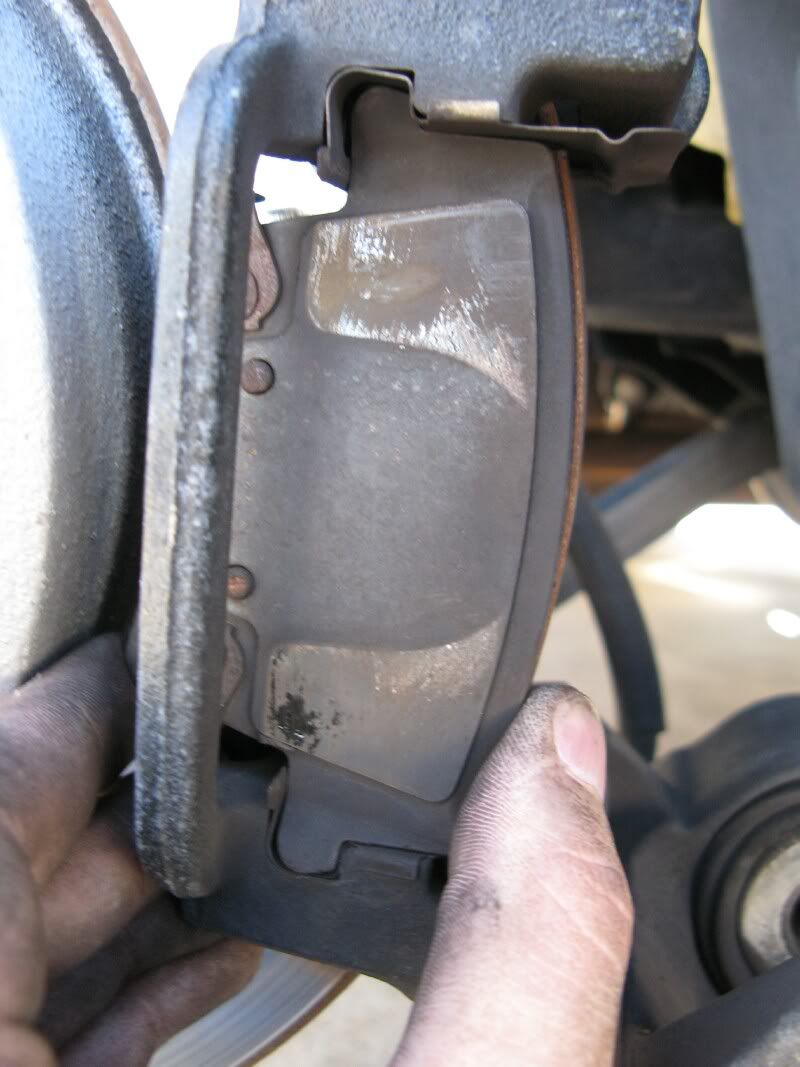
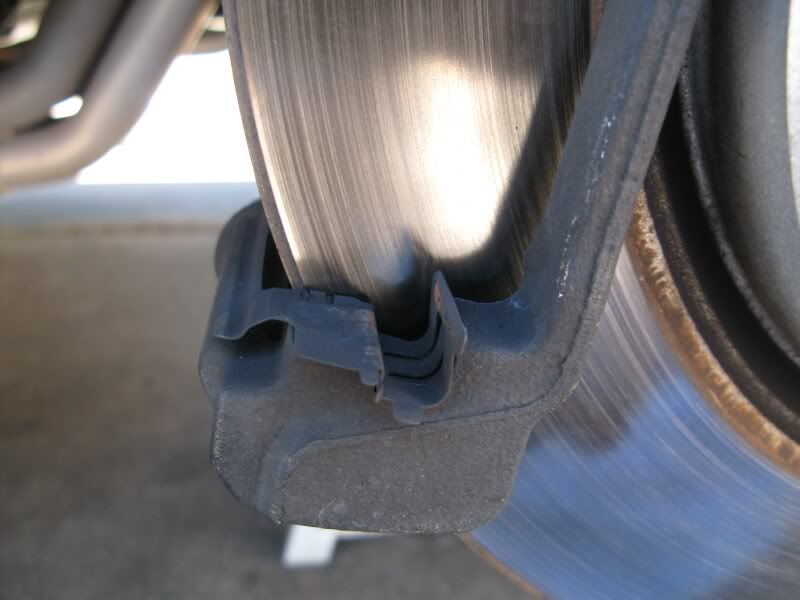
Then simply lift the brake pads out of the "caliper adapters" on each side (inside and outside):
![Image]()
If they're grimy, you can take out the "anti-rattle clips" and clean them up.
![Image]()
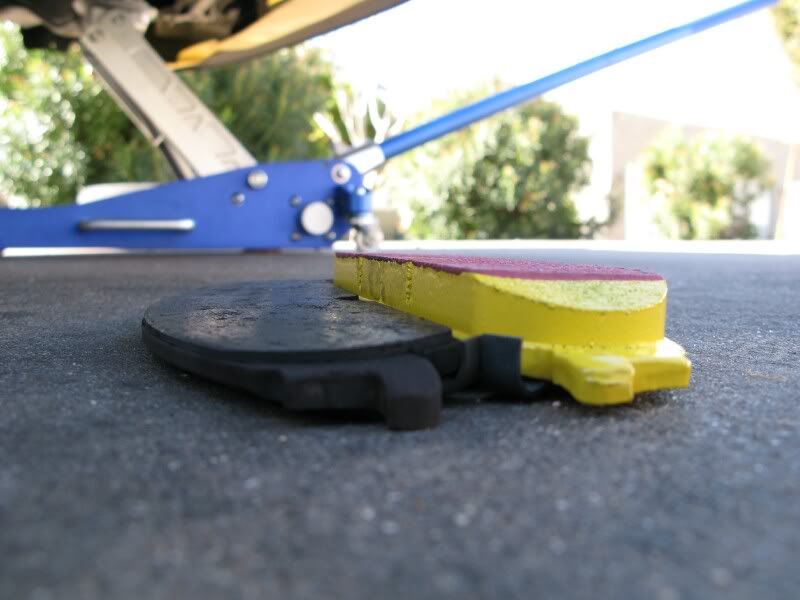
Wow, I guess it was time, eh?
![Image]()
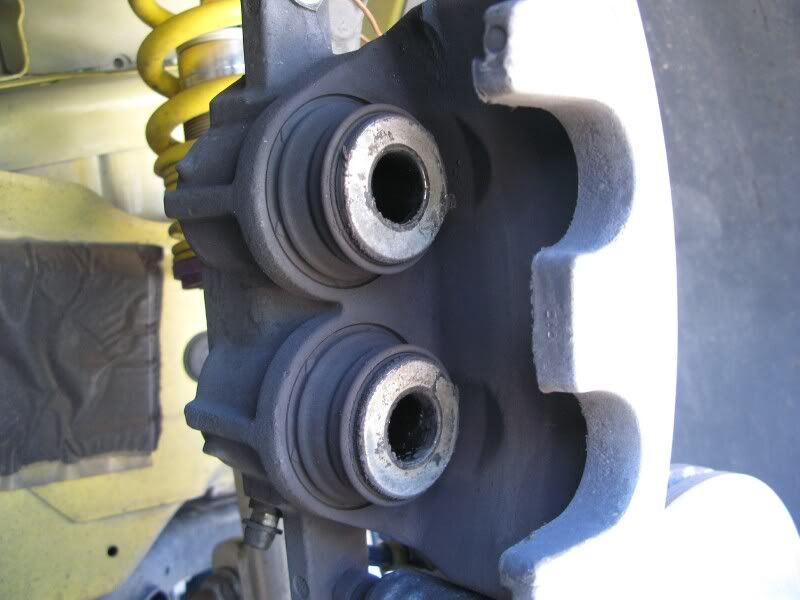
Because of the obvious difference in thickness from old to new, you need to provide more clearance to get the calipers over the new pads. Here's the pistons as the were:
![Image]()
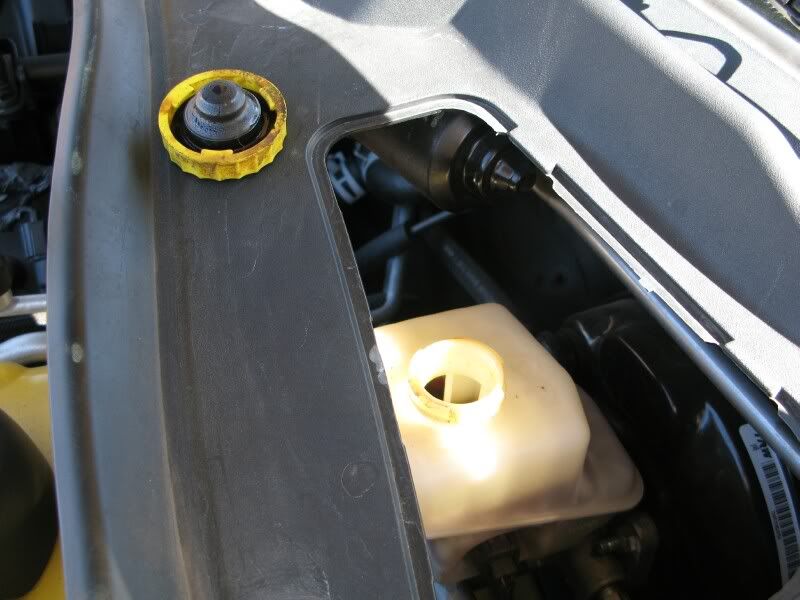
So you need to retract the pistons in their bore. First, open the brake fluid reservoir up in the engine bay, below the driver's side windshield wiper. DO NOT top off the reservoir at this time, even if it appears low. Retracting the pistons will return ALL of the original fluid to the reservoir.
![Image]()
Then take the Quick-grips and apply pressure to the pistons to retract them - do both at the same time - you don't want one to compensate for the other. If you use c-clamps, you must use a piece of wood (or similar) to protect the faces of the pistons. Quick-grips are the way to go, if you have them:
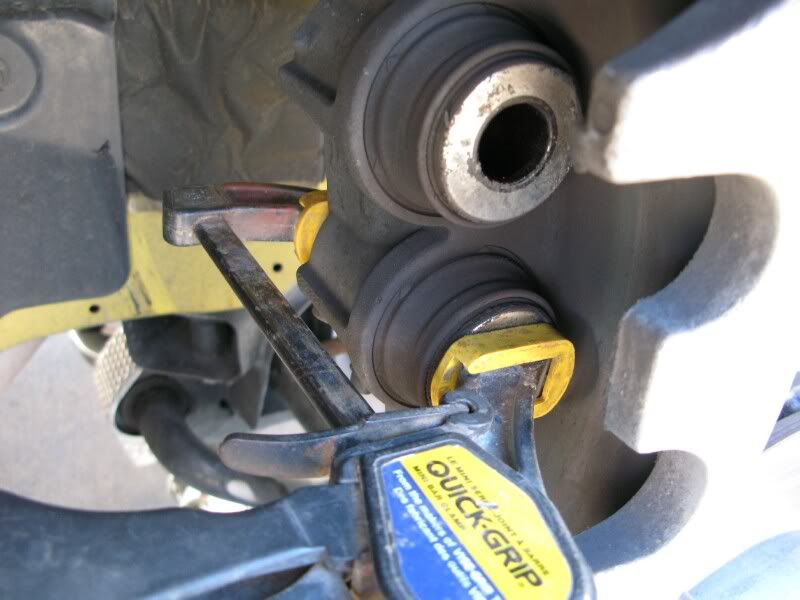
Here's how they'll go (but remember - wait until both clamps are on there - do both at the same time):
![Image]()
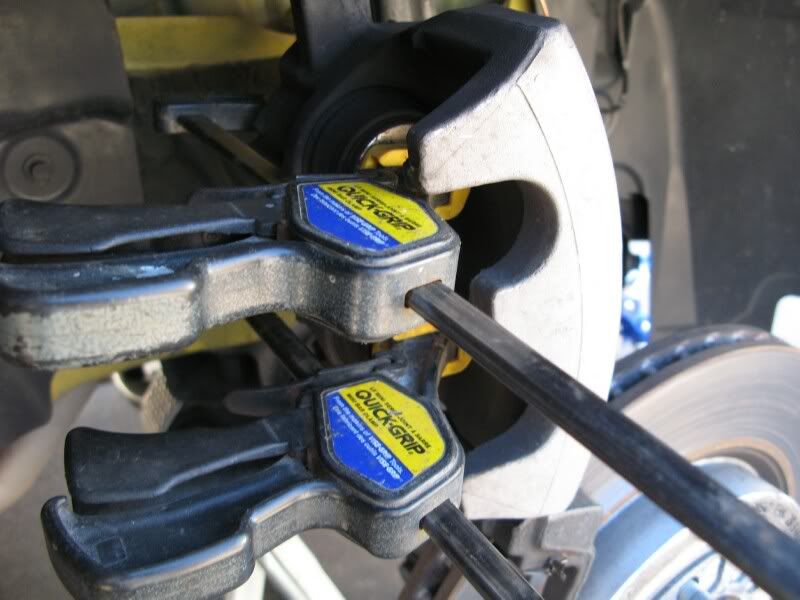
Both clamps on:
![Image]()
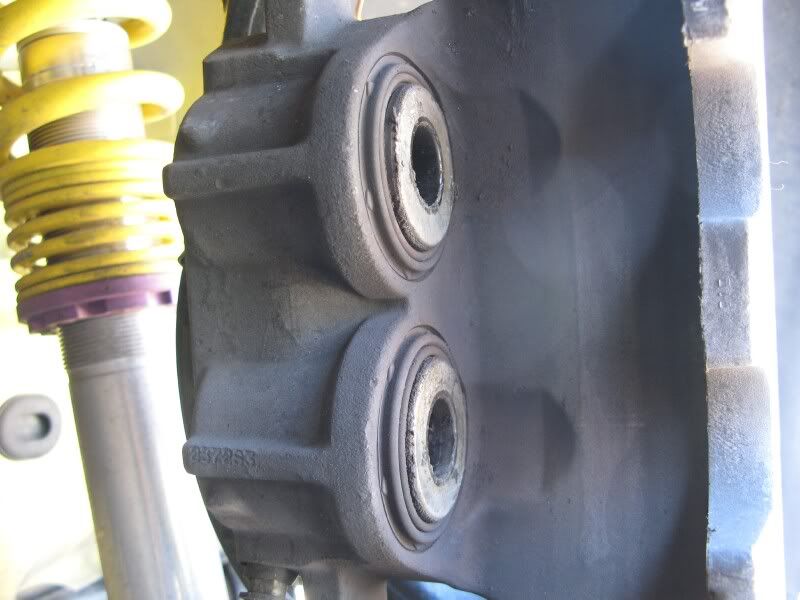
Here are the pistons fully retracted:
![Image]()
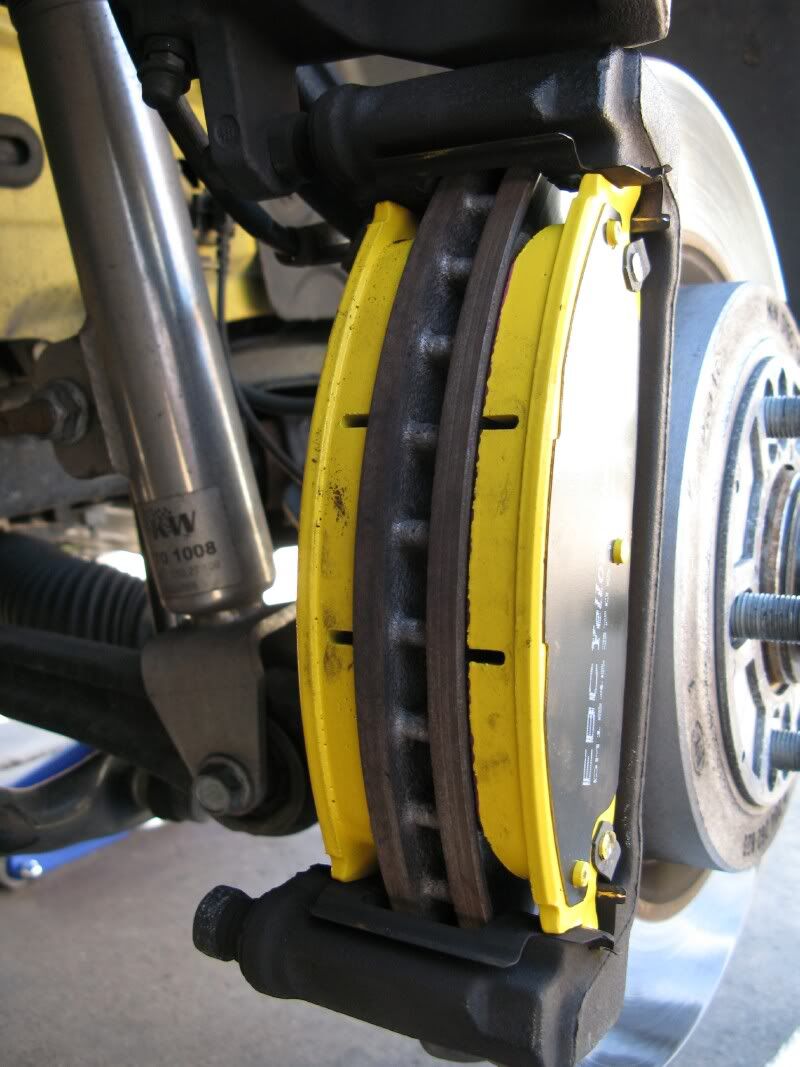
And the new pads swapped on:
![Image]()
Tools needed:
13mm, 15mm, and 18mm box- and open-end wrenches.
Two Quick-grip clamps, or c-clamps with two small blocks of wood (1x2x2 or so).
12" of some tie-wire or string.
Aerosol brake cleaner.
Front Brakes - Starting Point:
Here's the top of the caliper assembly. You'll be working on the bottom of the assembly, not the top, but it's easier to see what needs to happen when looking at the top. There's a 13mm bolt that comes from the backside of the assembly, and a bushing that it passes through (called the guide pin), which needs to be held with an 18mm wrench:
Here's the bottom of the caliper, with the wrenches on the fasteners. You need to remove the 13mm bolt, while keeping the 18mm guide pin from spinning:
Once it's loose, remove the bolt:
Then take the end of the 13mm wrench and pry the caliper away from the assembly:
Then rotate the caliper up and away from the assembly. If it's really snug, before you rotate the caliper upwards, pull the caliper towards you firmly for a few seconds, and then back away from you - this should retract the pistons enough to provide the clearance necessary.

Here's the caliper rotated up. Tie the caliper up and out of the way (I used some copper wire):
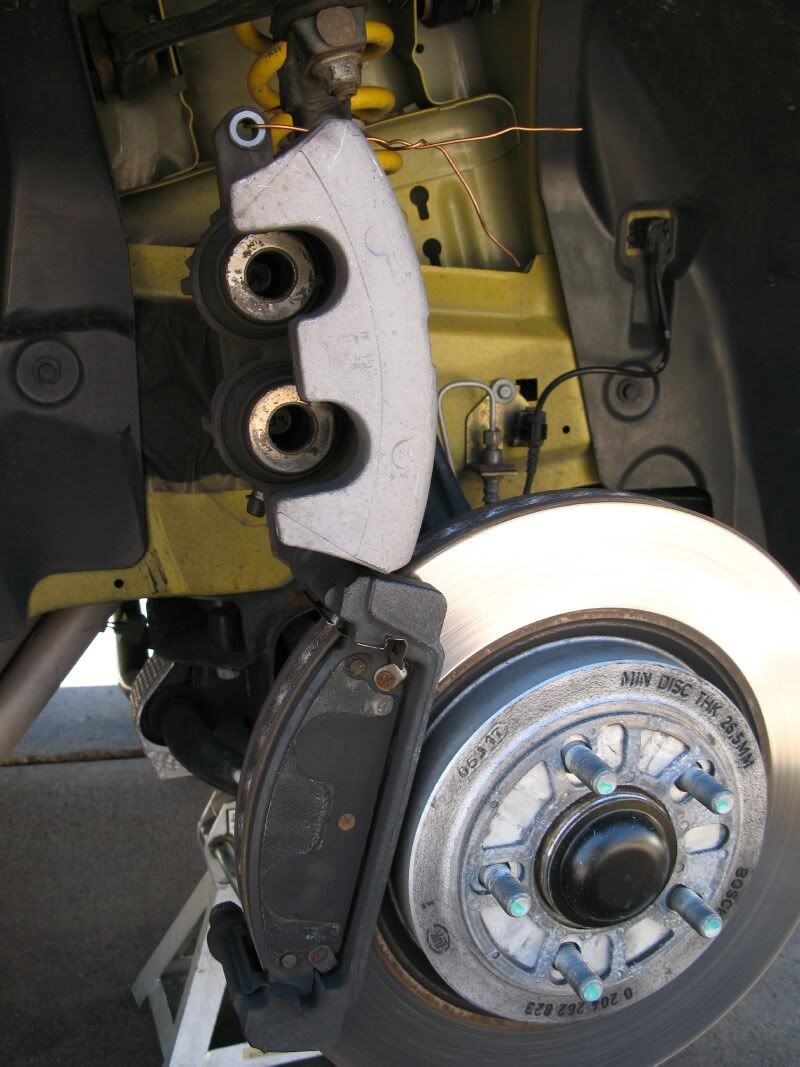
Then simply lift the brake pads out of the "caliper adapters" on each side (inside and outside):

If they're grimy, you can take out the "anti-rattle clips" and clean them up.
Wow, I guess it was time, eh?
Because of the obvious difference in thickness from old to new, you need to provide more clearance to get the calipers over the new pads. Here's the pistons as the were:
So you need to retract the pistons in their bore. First, open the brake fluid reservoir up in the engine bay, below the driver's side windshield wiper. DO NOT top off the reservoir at this time, even if it appears low. Retracting the pistons will return ALL of the original fluid to the reservoir.
Then take the Quick-grips and apply pressure to the pistons to retract them - do both at the same time - you don't want one to compensate for the other. If you use c-clamps, you must use a piece of wood (or similar) to protect the faces of the pistons. Quick-grips are the way to go, if you have them:
Here's how they'll go (but remember - wait until both clamps are on there - do both at the same time):
Both clamps on:
Here are the pistons fully retracted:
And the new pads swapped on: